


Several Surgeon General- type warnings need to preceed this post:
1. I am, innoshapeorform, qualified to give any sort of photography "expert" advice. I'm just going to pass along some recently learned information.
2. This is most likely going to be a long and technical post. You are under no obligation to dedicate yourself unless you are interested in photography technicality or you care about cute pictures of my kids. One or the other should keep you entertained.
Seriously, I have come across about a dozen posts like this in the past and have never wanted to take the time to learn about my camera before now. If this is your now, well then, Come On!
3. All this info came from my friend, Melissa, who was kind enough to share some trade secrets. She's the real expert and has taken many, many adorable pics of my kiddos and countless others of all ages- including our Christmas cards. {Yes, that's 4 different links. If you have been reading for any amount of time you might know of my love of Melissa.}
Deep cleansing breath. Let's go.
Monday night I took a photography crash course. Before you start thinking I'm all lucky ducky and why-didn't-I-invite-you, you should know this was an education seminar for the Junior League. The point was to educate some regular schmoes on how to operate their fain-cee cameras they bought, but don't know how to use so we could take pictures of Junior League events that could be used for publications.
So, I was a willing schmoe. And so were 10 other people. The class filled up in under 10 minutes, so there were even schmoes on a waiting list.
We all sat at Melissa's beautiful studio, willing and able to soak up her infinite knowledge, and admitted that we had never ventured off the Auto controller on our cameras.
* Melissa said that 90% of the time, the Auto controls are the wrong setting for your picture.
So, since my home base on my camera is the Auto setting- and sometimes SCN (for Scene) if I'm a little wild- my ears perked up and I decided to listen.
There are 3 things that determine the exposure of your picture:
Aperture
ISO [International Standards Organization] and
Shutter Speed.
I have heard all these terms before this workshop, but since I didn't understand them, they kinda made me queasy. But I took the plunge and was willing to learn. We met our neices at the park this afternoon so I could try out some of my new knowledge.
Aperture controls the amount of light you let in the picture. Technically, it's the amount of light let in the lens. For some reason, the level of aperture in represented by a weird term: f-stop. The larger the f-stop number, the smaller the opening in the lens. And vice versa.
Once you learn how to play with this on your camera, the main side effect to be concerned with is depth of focus.
The f-stop numbers on your camera are actually opposite of what you would think {FINE: what I would think}. The smaller number means there is a large aperture {f2.8= small depth of field/ large aperture}. The possible concern {unless you are going for this look, of course}, is that subjects far away from your focus point will be out of focus.
Here is Henry playing and his face is the focus and the background is out of focus. I have to admit that I did this with editing software on the back end {Picnik effect Fancy Focus}, but this is the idea. You'll see I was pretty close to most of my subjects today, so I didn't get a good chance to show this as much as you would be able to if you had a line up of people. Or if the kids you took to the park would be still for one solitary second.
This is a great technique to use if there is clutter in the background of your area or small things
like graffiti behind your beautiful child's head.
Danggit. You will notice now. But you didn't before, did you?
On the opposite side of the coin, f22 would be a small aperture, with a large depth of field {most subjects in your image will be in focus}. This is great to use if you are outside and there is a ton of light or you want to get a picture of 12 smiling 4 year olds in a row {vs. the one 4 year old that you actually care about}.
Here's Ollie in the soccer net. And I think this is an example of small aperture because the net at the bottom is still in focus-ish. I really don't know, but I liked the picture, so here you go.
ISO is next and it has to do with the sensor sensitivity to light. Remember when you used to buy film for your crank-a-jank cameras {in 200, 400, 600 or 800?}? I would always buy 800 because I wanted my pictures to be the coolest and that was the higest number. Smart cookie, aren't I?
Well, that is great for outdoor pictures with a lot of light, but the inside pictures would always look grainy. Anyone else?
Same thing goes to the ISO settings on your camera now. The higher the ISO, the more sensitive your film is to light.
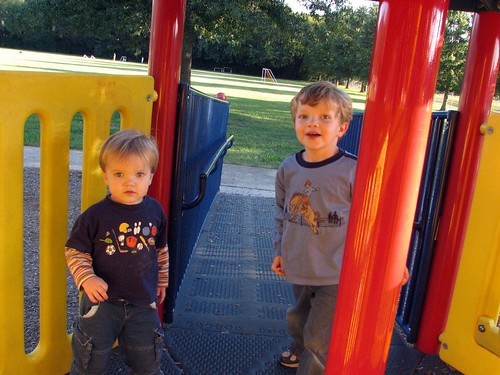
I didn't do too much fooling around with this setting today since it was bright as all get out and this was a no brainer. The average setting {at least on my camera} for ISO is 200 and I kept it there. So you get some pictures I loved just for your viewing pleasure.
Here is my sweet little neice, M {3}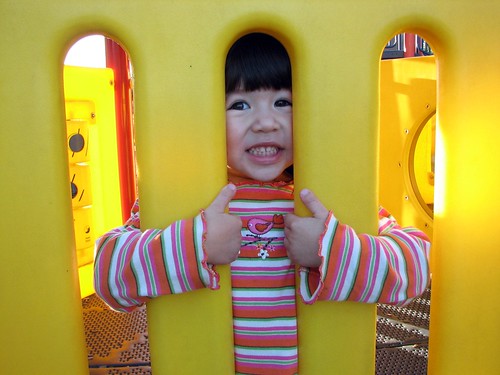
and her younger sister, M {2}.
Another invaluable tip is if you completely blow the color control on a picture, make it black and white! VOILA!
Finally, Shutter Speed is the 3rd factor in exposure.
Shutter speed is the easiest one for me to understand. It's the length of time for the actual Click of the picture. {If you just thought "Click! Take a Pic!" from Dora, we should be friends.}
I did play around with this quite a bit and the numbers are a little confusing, too, like the aperture f-stop numbers. If someone says 125, that means 1/ 125th of a second that the camera is opened. So, 1 would be a very slow shutter speed and 1600 {really 1/ 1600} would be super fast. I found that anywhere from 1/ 125- 1/ 250 worked well with my fast moving kids.
The idea behind shutter speed is to freeze action and I am ALL-ways trying to do this and have hundreds of blurry pictures to prove it.
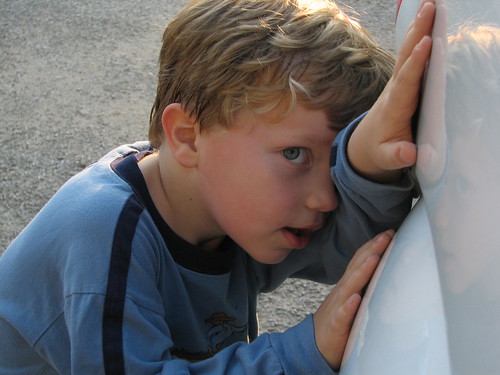
Here is Ollie frozen mid-air in a jump {really fast shutter speed}.
And here is M jumping {really slow shutter speed}.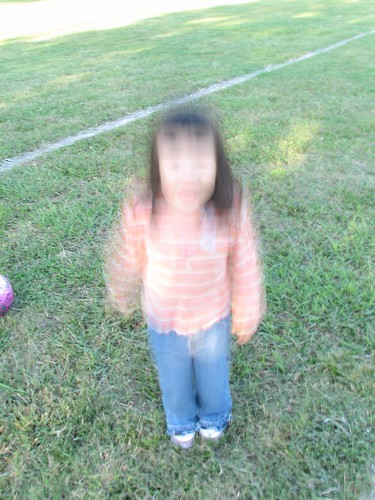
The only reason I can think that you would want that blurred effect would be for some sort of artistic version of a picture {like a cheerleader being tossed in the air or one of your kids throwing their food across the table}.
Those are the basics, folks. Melissa was a great teacher, but I have to admit the student still needs a lot of work.
As a wrap up, here are the Biggest Tips I've Learned:
1. You HAVE to read your camera manual. These key words {above} will give you an idea of what to look for and where to begin.
2. Don't be afraid to try different settings and even going to the manual setting- EGADDS!
3. Know what look you are going for and set your camera accordingly before you start shooting.
4. Set the white balance on your camera and don't be afraid to change it or play around with it. This will help tremendously if you are inside and keep getting yellow-y pictures.
5. TURN OFF YOUR FLASH. I have read this a dozen times- and obviously didn't need it today- but have learned that you really don't need it on your camera if you can control the other exposure features.
Here are the rest of my favorites from today:

I cannot begin to tell you how fast I'm gonna slap this picture below in a frame. 
I think my subjects got a little tired of having their picture taken.
"For the love of fruit snacks, Mooooom, we are back at the car. Put down the stinking camera."
Thanks for coming to my photography mini-session! I hope you learned something... anything. And I really hope my pictures improve for you!
What's your favorite photography tip to share?
Wednesday, September 30, 2009
Photography Tips from a Pro {not me}
Subscribe to:
Post Comments (Atom)


13 comments:
No tip here, but thanks for your tips. Sometimes I will change my settings out of the auto focus to 'play' around. But by the time I print the pics I have no clue what setting I used! This is yet another thing that I wish I had time to learn or take a class. I will say that I actually signed up for a class yesterday to learn how to smock! I'll let you know how that goes.
My favorite tip is to play around with the placement of your sunjects in the frame. For instance, don't center everyone right in the middle for a straight on shot. Move your camera around. You could have the subjects in the left with scenery to the right for example. Play with your angle too. These are your pictures! Be creative!!! I have found this to work great with my photography business...people like a little variety.
Great tips Hillary!! And I love all the pictures you took. I'll have to play around with my camera more. I haven't taken any fall pictures yet and the kid are out of school for the next 2 weeks for fall break so maybe I'll do it then.
Ugh. It's just so...hard. I really need to learn more and work more and just, I don't know, be better at this. Thanks for the tips. Now will you come to my house and teach me in person? :)
one tip from me: i'm not a fan of "on-camera" flash. especially used indoors. so i'll crank my iso up a little higher and open my aperture as far as i can and slow my shutter speed down (this is for relatively still objects/persons, of course). a good rule of thumb for shutter speed (this is for hand-held pics, not tripod). you should go twice the length of your lens. for example. i love to shoot with my 50 mm. so my shutter speed should not go below 1/100 of a second for a crisp shot. is that confusing?? i just reread it and i even confused myself a little...
OK, Click! Take a Pic! is from Diego... ;-)
Thanks so much for the tips and the great shots of my girls. And it was a great day to get out and let them run! Now I actually have to find the manual to my camera.
My favorite tip for pics is to take them when the subjects don't know you're taking their picture. I love the ones I have when they are absorbed in their own world, and I just get a peak in it.
Those are great tips...and wowee, that's a lot to remember!!
Thanks for the lesson, Hillary. You are da' mama!
I've never messed with the aper-somethin-or-nother, of the F-thingymabob, but will venture out and try it now. Great pix of those kids! And thanks for the laughs this morning. You always make me laugh long before I've actually woke up!
kim
Thank you so much for the nice comment on my "marriage is a teenager" post.
I love taking photos and give my camera most of the credit. It makes a huge difference when you devote time to practice playing with your camera. Fiddle with the settings, remembering what you've done. My biggie is to pay close attention to white balance.
Hey Hillary, I have a special Nugget for you! ISO doesn't actually stand for International Standards Organization. It's International Organization for Standardization. They're based in Switzerland. They decided since the acronym would be different in different languages (the French would be "OIN") that they would give it the shortform name of ISO for all nations.
No, I didn't know that all off the top of my head (www.iso.org) but I have dealt with the ISO 17025 standard at work, so had heard that ISO didn't really directly stand for anything.
Loved this post! I can tell you that I have not read my camera's manual (I've meant to, OKAY!) but my photo editing software I LURVE. Anywho, this did inspire me to take my kiddo to the park for my own little photo shoot(after a horrific, tantrum-filled experience at The Picture People Studio at the mall). I'll post them eventually on Jacob's blog! Thanks again for the tips!!!
this is an awesome post--i want to read it a few times and learn more. hey, will you be at blissdom?? xo
My tip is don't take a photography class in college because you think it will be an easy A. It will be the toughest course of the semester. And your professor will single you out in class by asking you hard questions because he thinks you are a ditzy girl just beucase you wear pink sweats.
OK, maybe that last comment was just for me, but I promise you the first one will be true for you too. Developing your own film in the darkroom will be fun though.
Post a Comment
You're leaving a comment? Thanks!
You make my day!
I'd hug you, but this screen makes it a little awkward.
xoxo,
Hillary